Creating a cross-section profile of a geological map helps visualize the subsurface features and relationships of different rock layers and structures. Here’s a step-by-step guide on how to draw a cross-section of a geological map:
Select a Transect or Cross-Section:
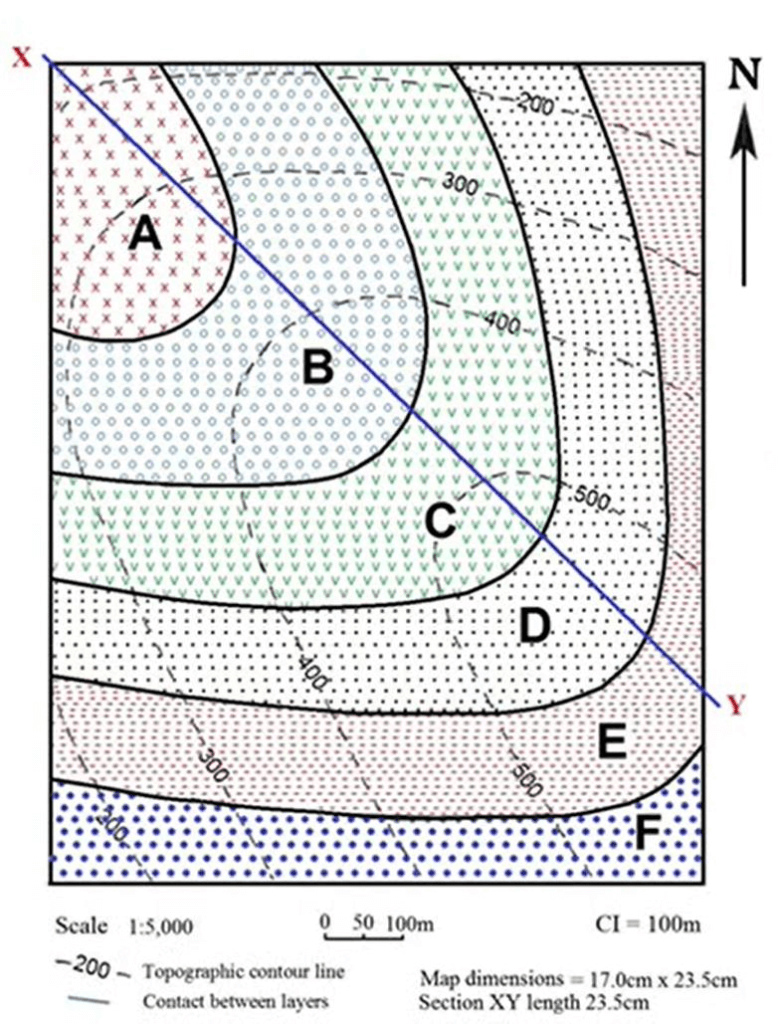
Choose a line along which you want to draw the cross-section. This line is called a transect and represents the path where you’ll visualize the subsurface features. In our case, it’s line XY. The black dotted lines are contour lines along with elevation mentioned in metres. The solid black lines represent the bedding planes.
Draw Strike Line
Now draw strike lines where the contour line intersects the bedding planes at two points (The red lines in the figure). You may need to extend the bedding planes out of the given boundaries to draw strike lines for all the contours.
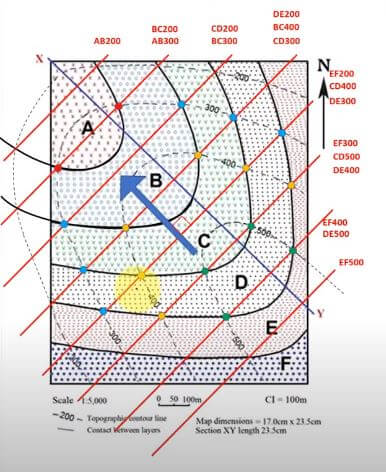
How to find the angle of dip using strike lines
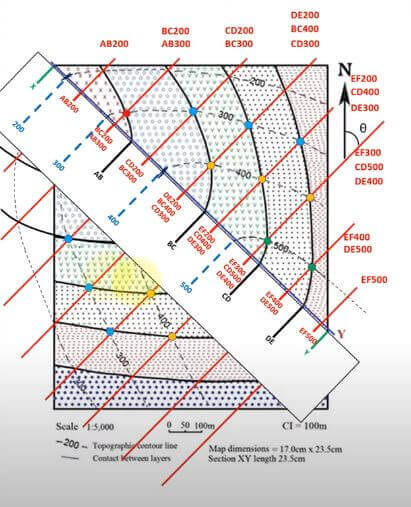
Trace Elevations and Rock Layers
On a strip of paper mark all the strike lines, bedding planes and contour lines keeping the XY line as a reference line.
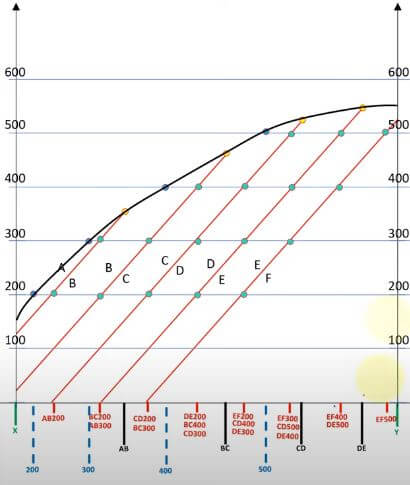
Plotting
Mark the y-axis with contour intervals showing elevation and the paper strip makes the x-axis. The X and Y points of the reference line should coincide with the y-axis lines drawn on the left and right.
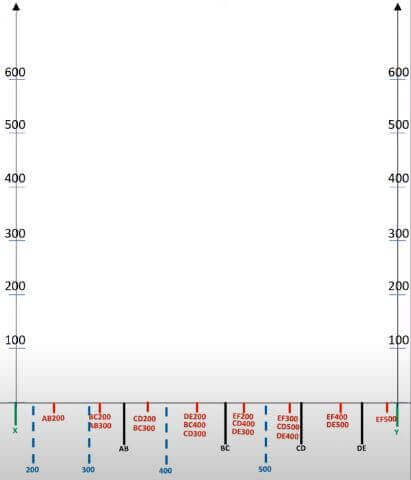
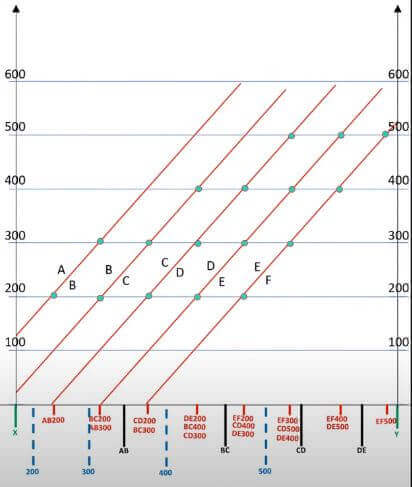
Draw all the strike lines by connecting all the intersection points of strike lines and contours. Next, we have to mark all the bedding planes.
Connecting all the top points will give us the surface of the map while the front profile can be shaded like the original map to give a detailed view of types of rocks.